Hello friends, today we are going to discuss Override Standard Buttons Using Aura. Ever felt the need to customize the behavior of standard buttons in Salesforce? 🤔 Well, you’re in luck! In this post, I’ll guide you through the process of overriding standard buttons using Aura components. Let’s dive in!
Also, check this: Call Flows From Apex In Salesforce
Key Highlights :
- 🔧 Customization Unleashed: Learn how to break free from standard button constraints and tailor Salesforce to your unique needs. Aura components provide the flexibility you need for a seamless user experience.
- 🖱️ Step-by-Step Guide: Dive into the nitty-gritty details with a step-by-step tutorial. From creating Aura components to associating them with standard buttons, I’ve got you covered at every stage of the process.
- 💡 In-Depth Configuration: Explore the Lightning App Builder and understand how to integrate your custom components effortlessly. Make your customization journey a breeze with clear and concise instructions.
- 🌐 Object-Oriented Customization: Tailor the experience for specific Salesforce objects. Whether it’s Accounts, Contacts, or any other object, learn how to override standard buttons with precision.
Code :
LightningExperienceOverride.cmp
<aura:component description="overrideStandardButtonExample" implements="lightning:actionOverride">
    <aura:attribute name="newContact" type="Object"/>
    <aura:attribute name="targetNewContact" type="Object"/>
    <aura:attribute name="newContactError" type="String"/>

    <aura:handler name="init" value="{!this}" action="{!c.init}"/>

    <!-- Use record Data -->
    <force:recordData
        aura:id="contactRecordCreator"
        fields="LastName,Email"
        targetFields="{!v.targetNewContact}"
        targetRecord="{!v.newContact}"
        targetError="{!v.newContactError}"
    />

    <lightning:card iconName="action:new_contact" title="Create Contact">
        <div class="slds-p-horizontal--small">
            <lightning:input label="LastName" value="{!v.targetNewContact.LastName}"/>
            <lightning:input label="Email" value="{!v.targetNewContact.Email}"/>

            <div class="slds-m-around_medium">
                <lightning:button label="Save Contact" variant="brand" onclick="{!c.saveContact}"/>
            </div>
        </div>
    </lightning:card>

</aura:component>
LightningExperienceOverride.js :
({
    init: function(component, event, helper) {
        try{
            // Prepare a new record from template
            component.find("contactRecordCreator").getNewRecord(
                "Contact", // sObject type
                null,      // recordTypeId
                false,     // skip cache
                $A.getCallback(function() {
                    const rec = component.get("v.newContact");
                    const error = component.get("v.newAccountError");
                    if(error || (rec === null)) {
                        console.log("Error: " + error);
                        return;
                    }
                })
            );
        }catch (e) {
            console.log({e})
        }

    },

    saveContact: function(component, event, helper) {
        component.find("contactRecordCreator").saveRecord(function(saveResult) {
            if (saveResult.state === "SUCCESS") {
                // record is saved successfully
                var resultsToast = $A.get("e.force:showToast");
                resultsToast.setParams({
                    "message": "Contact record created!"
                });
                resultsToast.fire();

            } else if (saveResult.state === "ERROR") {
                // handle the error state
                console.log('Error: ' + JSON.stringify(saveResult.error));
            }
        });
    }

});
To override a standard button the aura component must implement lightning:actionOverride, the aura component will show up as available after adding it to implements.
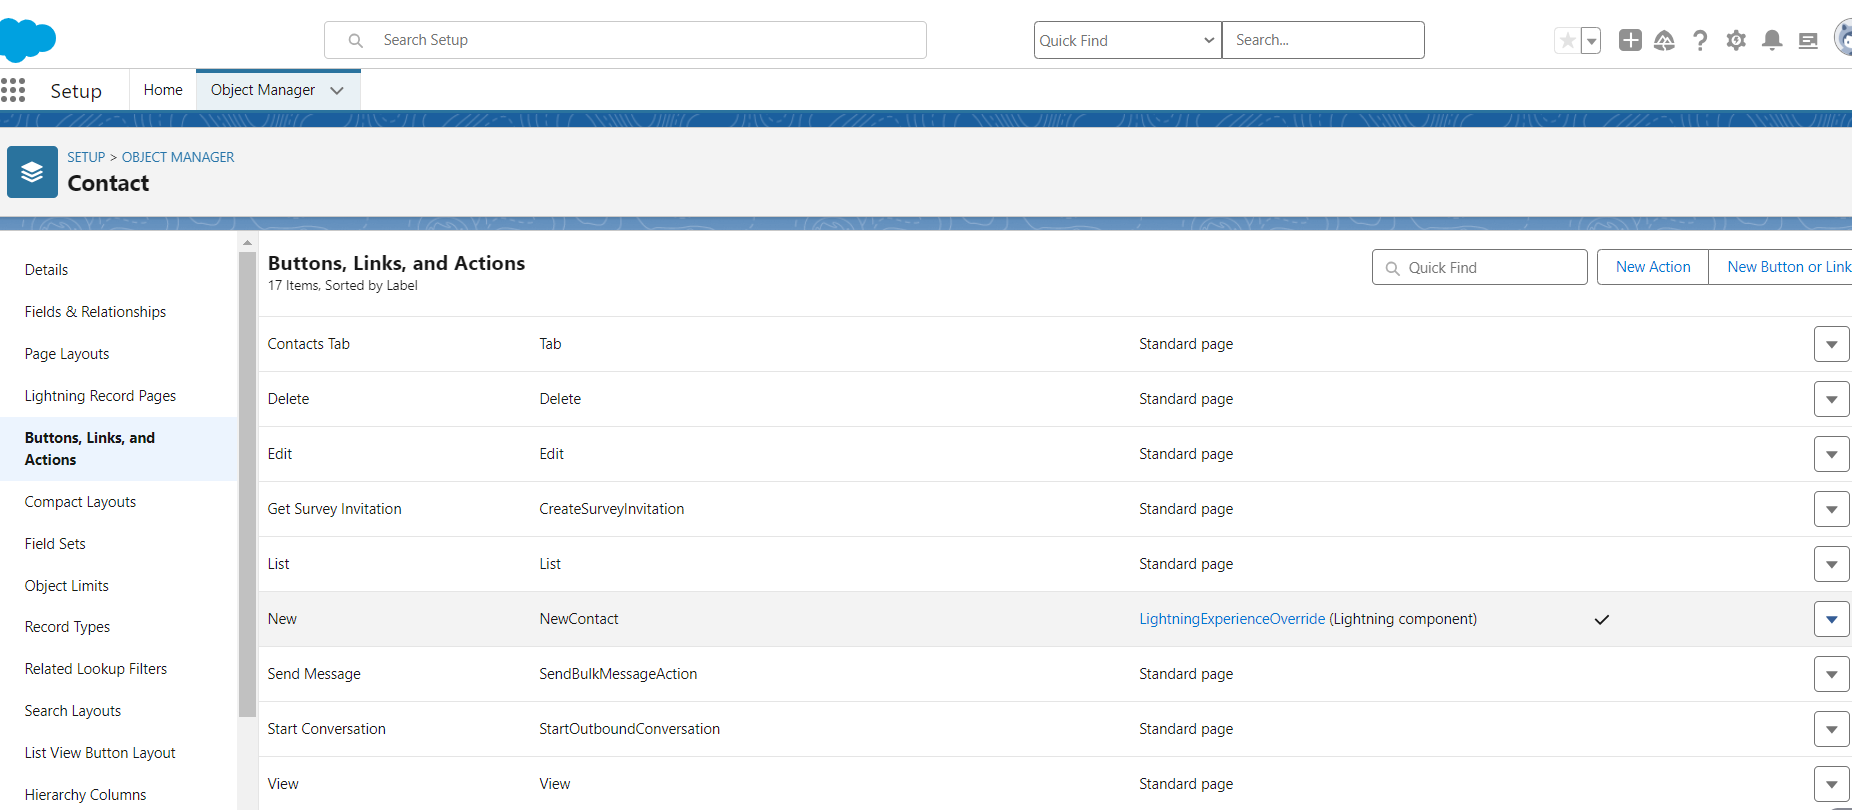
To override a button using aura components, go to Setup -> Object Manager -> Click the Object you would like to override the button for.
In this example we are overriding the Account Object new button, on the Account object, we click the Buttons, Links, and Actions option.
From here click the dropdown arrow for New and click Edit

In the Lightning Experience Override option click the Lightning component option and we should see the aura component in the dropdown.

Click Save after selecting the Aura component.
Now when viewing an account list the New button will be referencing our Aura component.

We can see our custom card design and fields now when clicking the New button for the Contact object.


 Total views : 1017821