Hello friends, today we will discuss What Is Named Credentials, AuthProvider & Use In Apex Salesforce.
Salesforce manages all authentication for callouts that specify a named credential as the callout endpoint so that you don’t have to. You can also skip remote site settings, which are otherwise required for callouts to external sites, for the site defined in the named credential.
Also, Check this: Google Search Address API in Apex Salesforce
Highlights Points :
- No need to create records for remote settings.
- Access token manage by Name credintial so we don’t need to call extra callout for access token.
- We don’t even have to handle Authentication in code.
- It is more secure and we can do the OAuth Implementations flawlessly.
- Easy for admins to maintain.
- Secure storage of credentials.
- The callout is easier to maintain. No hard coding needed.
Step 1: In this step, we will create Auth Provider (It is needed for OAuth 2.0 Authentication).
To create Name Credentials for OAuth 2.0 we need to create an Auth Provider as well in the salesforce that will manage the authentication for that endpoint of callout.
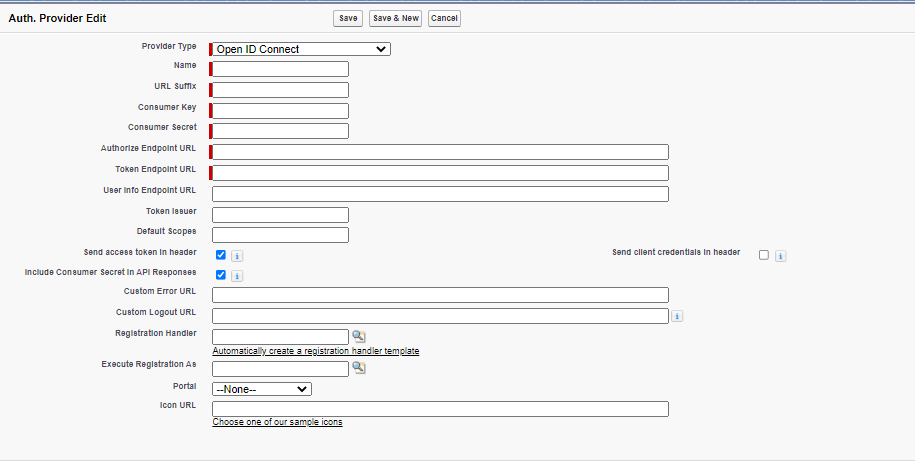
To create Auth Provider go to Setup > Auth. Providers > New
Select provider type in the picklist, if not found third party name then select Open ID Connect for all type of providers records.

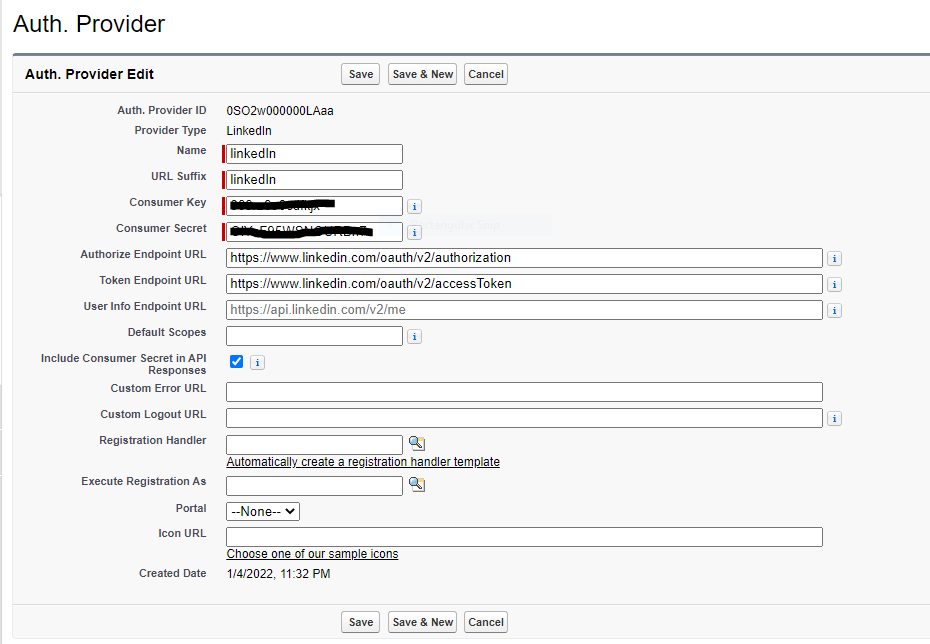
Here I am doing LinkedIn integration, so choose LinkedIn.

Key Details Required for Creation of Auth. Provider:
- Client Key – will get this from the Api that has been created for integration in target environment (for example- LinkedIn)
- Client Secret- will get this from the Api that has been created for integration in target environment (for example- LinkedIn)
- Authorize Endpoint URL – URL to get the authorization code.
- Token Endpoint URL – URL to get the access token in exchange of authorization code.
- You can also specify the Default scope but it is not required.
After hitting the save button, scroll down and check Salesforce Configuration, Copy these URLs, and paste in the third-party app for call-back URL.

when we create auth provider salesforce automatically generates some URL out of which we will use the Callback URL
as the callback URL in the API that we created in the target environment.
Once this is done we will create the named Credentials.
Step 2: In this step, we will create Named Credentials, and we use this in apex class so it is very necessary.
Go to Setup > Named Credentials > New Named Credential. And fill the inputs with appropriate values.

Key Details needed:
- URL – This is the callout endpoint’s URL.
- Authentication Protocol – For now we will select OAuth 2.0
- Authentication Provider – Here we will select the authentication provider which we have created in previous steps.
- Check the start authentication flow on save checkbox.
- check generate authentication header checkbox.
Now after saving this the Authentication status should convert from pending to authorized.
Step 3 : Here we will create an HTTP callout apex class so we can GET/POST the data to a third-party App.
Let’s check out how we will use this in code:
public class NameCredintialUseCtrl {

    public static void getAccountInfo(){
        HttpRequest req = new HttpRequest();
        Http http = new Http();
        HTTPResponse response = new HTTPResponse();

        req.setMethod('POST');
        req.setEndpoint('callout:linkedInNamedCredential/some_path');
        //here callout: is fixed, then after namecredintailname, then after add slash and appropitate url, in which url you want to hit
        response = http.send(req);

        System.debug('response-' + response);
        System.debug('response-' + response.getBody());
    }
}
Note: Here callout: is fixed, then after name credential, then after add slash and appropriate URL, in which URL you want to hit. No need to manually set any headers here. Salesforce will add this for us automatically
So this is how we will use named credentials in code and that’s an easy way to reduce the custom code for authorization of external system and also this is a more secure way then doing it with custom code.
Reference: Named Credentials in Salesforce

 Total views : 1192058
1 comment
Hi Himanshu, I’m trying to connect to Quickbooks Online in this way, but I’m getting an error after I authenticate and authorize the company in quickbooks, I saw you have another post sending accounts from SF to Quickbooks, but the named credential setup took me to this post and this example is with linkedin, Do you have any example or details on the auth provider and named credential with QB?
Thanks in advance